
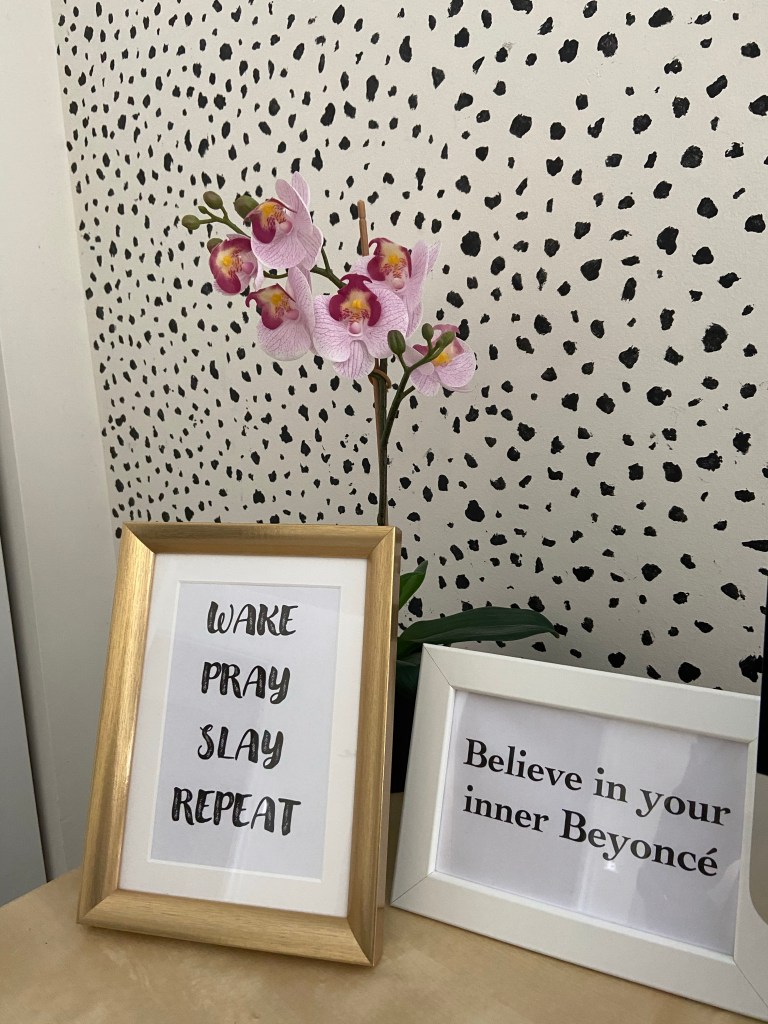
During the quarantine, I’ve spent more time at home than ever before. As I sat in my second bedroom/office, I decided it was time to spruce up my at-home workspace. For less than $40 I was able to create my own spotted wall and I am in LOVE with it! If you’d like to do it too, I’ve included a download of my stencil.
After some time browsing on Pinterest, I became slightly obsessed with dotted wallpaper, but after pricing it, I was not obsessed with the price. So, I did some research on my favorite site (Pinterest) and was inspired to DIY the dotted wall. I am in LOVE with how it turned out.

When I started this project I definitely underestimated how long it would take me. I thought I could do it in a day (which I did), but it was more of a 2-day project (I was just determined to get in done in a day). At first, I considered freehanding the design and painting each dot, one by one, but I came across another blog post where they created a stencil. So I figured, genius! I’ve covered the materials, process, and takeaways below! Check it out!
The Materials
- Xacto Knife $7
- Brush set (this is a similar variety pack, I purchased a 3pc set in-store, and used the smallest brush) $6
- Laminator (borrowed my Mom’s laminator – $12.99 at Aldi)
- Painter’s tape $4
- Paint Sample – Sherwin Williams Tricorn Black (Sign Up for PaintPerks® for a discounted price) $6
- Stencil (click to download my PDF to make your stencil) $0
The Process
I found an image of a design, saved in Microsoft Word, printed it, laminated it, then spent a few hours cutting out the dots with a Xacto knife. Then to make sure I liked the style and pattern, I tested the stencil on a piece of paper. And VOILÀ! In love! I was off work the next day and thought “great, I’ll do this on my day off”. Of course later to find out, the one day project that I thought would be 8 hours, turned into about 14-15 hours.

Before applying the stencil, I cut away the trim so the stencil cut-outs were close to the edge. I started in the top right corner (simply out of preference), taped my stencil with painters tape, and dabbed my brush into the spots. No dry time was needed between each application, and the paint was dark enough to only apply one coat. TIP: Make sure you don’t over-apply the paint in this process, which could result in running on the back of the stencil. I learned this on the first stencil application and had a blob, but corrected later. After removing the stencil, I put it face down on a paper towel and used another paper towel to wipe off excess paint from the back.

Then for hours, I reapplied the stencil and repeat. After finishing a couple of rows, if needed, I freehanded a few dots to fill in any empty areas. I also took this time to replace the tape I used as tabs to stick my stencil to the wall.
Takeaways
- Make more than one stencil or make one the length of a banner, definitely more than one sheet, it will help save some time
- Apply paint lightly, to prevent running behind the stencil.
- Don’t expect to complete it in one day (it can be done, but not recommended). Plan to make it a 2-day project.
- If you have a slight mess up, no worries, just patch it up later with touch up paint

Additional Office Updates
- New office chair
- Removed contact paper – from my previous marble contact paper DIY
- Spray painted the table legs (changed from metal/silver color to French white)
- New lamp from Amazon


